Moto Guzzi California Motorcycles
Moto Guzzi California Motorcycle Owners News, Reviews and More
Moto Guzzi California Valve Cover Gaskets
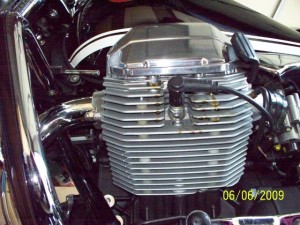 After returning home from a nice ride on my California Vintage, I was shocked to see oil dripping down the fins on the left cylinder.
I was lucky in a way because it apparently had just started only moments before. What could be causing oil to drop like this? Oil was dripping down fin by fin, and eventually landing on the left foot board and toe part of the heal-toe shift mechanism.
It seemed to happen almost as soon as I parked it on it’s side stand, but it kept on slowly dripping for several minutes after. In retrospect, it was not really that much oil at all, but when you don’t expect it and you always keep your engine as clean like I do, at that moment it seemed like an oil waterfall!
I immediately put the bike on the center stand and carefully checked the valve cover screws. The oil was still dripping a little, but all the valve cover screws were tight. I got a little scared thinking of all the horrible possibilities that could have caused such a leak. After searching for clues and answers, on the motorcycle, on the internet, and after speaking with my Moto Guzzi dealer about it, I began to realize that it was just the valve cover gasket that was leaking. This would be a very simple fix. I could have claimed it under warranty, but I’m a bit of a gear-head, so I decided to do it myself.
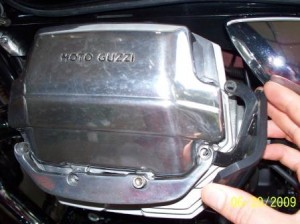 Replacing a valve cover gasket on a Moto Guzzi California is a lot like replacing a valve cover gasket on an older car, but easier because of the size. I say like an older car because there are no hoses and other stuff in the way, it’s beautiful. The California Vintage has 1064cc push rod engine with 2 valves per cylinder. This engine pretty much the same as the Moto Guzzi California V11 engine. It is simple and beautiful.
There are two other things fastened together with the valve cover, and those are the engine guard and the knee guard. There is nothing to removing those because thee same screws that hold the valve cover to the head also are holding these guards.
First, I unplugged the outer spark plug wire. If you didn’t know, this Guzzi engine has two spark plugs per cylinder. I then began to loosen the 8 valve cover screws, just a small angle of rotation each, going around the cover in a star pattern to try to unload it as evenly as possible. It may seem crazy, but I didn’t want to risk warping the mounting flange of the die cast valve cover.
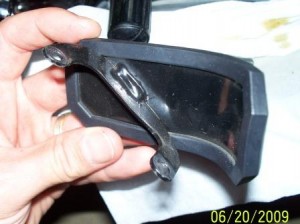 The knee guard is a sheet metal weldment with a ribbed black rubber cover on it. It is located near the intake manifold and is held in place by 2 of the valve cover screws. The lower screw also holds the end of the die cast aluminum engine guard, but that guard goes over the top of the knee guard sheet metal, sandwiching it in between the cover and the engine guard.
The rest of the engine guard sits directly on the valve cover, but that one end has the sheet metal thickness of the knee guard between it and the valve cover flange. It seems the engine guard would be unevenly clamped due to the knee guard, but that is the way it came from the factory.
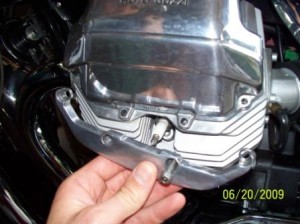 Also, I noticed there are no washers on any of the valve cover screws, which I thought was a bit unusual. With the knee guard and engine guard removed, all that is left to do is to remove the valve cover. I lifted very slowly and very carefully because I wanted to see what condition the gasket was in. I immediately noticed that the two lowest screw holes were torn out, and that the gasket had leaked from those areas, and the area in between those screws.
The original gasket was a relatively thick, dark gray material. The new gaskets from dealer were green and noticeably thinner. I carefully cleaned away any bits of gasket that were stuck to the valve cover and the cylinder head.
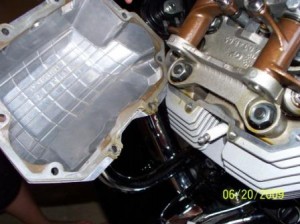 Finally, I positioned the new gasket onto the head and the placed the valve cover on. I was super careful to make sure the gasket holes were aligned perfectly with the screws as I tightened them down in a star pattern, applying a gradual and equal amount of torque to each.
Before I started up the Guzzi, I made sure that every little hint of oil stain was cleaned up and that it looked good as new, especially between the fins. If you don’t do this, how would you know if an oil stain was new or old?
After about one mile, I stopped and checked for leak. All was good. I rode about 5 more miles and then pulled over and checked again. 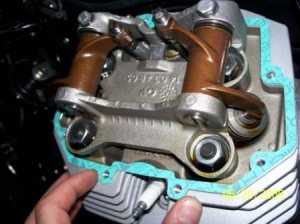 Finally, I rode a little while longer, checked again and began to realize that the problem was solved.
I have been told by several Moto Guzzi owners that the valve cover gaskets are normally re-usable for a few times; however, I think it’s a safer bet to go ahead and change them if you have the cover off for any reason. I suspect the first service valve adjustments may have caused the tears. These gaskets cost about $17 US for the pair from a Moto Guzzi dealer that had them in stock.
I hope you found this article to be helpful, and I hope you will come back to visit MotoGuzziCalifornia again soon.


Folks:
Does anybody have a table with all the torque values for the screws when fiddling with the California?
I also have the valve cover gasket oil-leak problem with my 2010 CalVin, and I am wondering with how much torque one should screw the gasket back in…
Thanks in advance.
Roy
I’ve got a 1994 Cali 1100 which I’ve owned since 11k miles. It now has over 46k miles on it. It’s never been touched by a shop. Early in my ownership (which is around 10 years now) I bought rocker cover gaskets and a sump gasket just to be prepaired. I’ve never fitted them, they are still sitting in a box file. Strange hey? I’ve also never changed the sump drain plug washer. Not even the slightest mist.
A technique I’ve used in the past on other bikes with problematic gaskets (eg. Suzuki GS rocker and alternator cover gaskets) was to attatch the gasket to the cover using a jonting compund such as Hylomar Blue. Then smear a thin layer of heavy (and I mean HEAVY or marine, not HT or moly) grease on the other sider. Mate the surfaces up an tighten down. This attaches the gasket to the cover with a fairly tacky layer (gasket compound) on the cover sider and an easy to break layer on the other side. The covers would come away easily the next time and the usually remain intact on the cover for reuse. Not had to do it for a long time of corse.
Mine leaked even after replacing the gaskets. What I have done to solve the issue is when replacing the valve cover gaskets, I put a light coating of Indian Head Gasket Shellac Compound on both flanges, let dry and use pilot bolts to ensure proper gasket placement. Has not leaked since utilizing this method.I have a 2002 ev11 and love it. Prior to that I had a 2000 Jackal. Loved it as well. Additionally you can get the gaskets considerably cheaper from Harpers Moto-Guzzi on the web or Motointernational. Moto-Guzzis rock. I change at every service interval ie. 6000 miles.
Thanks for the clear explanation, I have a 2008 California Vintage that I pick up last December and I am enjoying it very much.