Moto Guzzi California Motorcycles
Moto Guzzi California Motorcycle Owners News, Reviews and More
Installing 35W bulbs in fogs on Cal Vintage
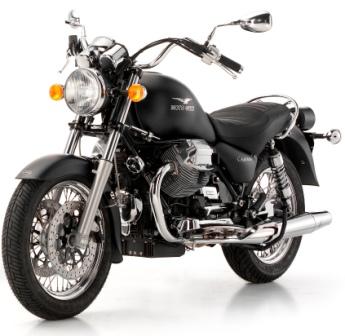
 The good news is that the Moto Guzzi California Vintage comes standard with two very bright auxiliary lights, sometimes called spotlights, fog lights or driving lights.
The bad news is that if you casually ride around town with these on for any significant period of time, you will drain your battery.
Here I show you how I changed these bulbs to reduce battery drain.
The good old air cooled Moto Guzzi 1064cc v-twin engine that I love, just does not have enough room for a larger factory alternator, so we make due with the rated maximum 350 Watts at 5000 rpm. I don’t know about you, but I certainly don’t ride at 5000 rpm. I enjoy riding within 2600-3000 rpm range on average. Maybe an occasional shift at 4500 rpm the mood strikes me. So, with the way I ride my California, the alternator just isn’t keeping up if I have the two factory 55 Watt auxiliary lights on. This is a common minor issue with the Vintage, but it’s easy and can be very inexpensive to resolve.
 The most simple way to fix this is to replace the factory 55 Watt H3 auxiliary light bulbs with 35 Watt H3 bulbs. I’ll show you step by step below exactly how I changed them on my 2007 California Vintage. I have no idea why I waited so long to do this.
For me, picking out which H3 replacement bulb to buy was quick. We’re a single income family and I can’t justify spending a week’s worth of groceries for a set of high tech bulbs. I went for just the 35 Watt standard halogen bulb for only $6 each. But, if you are so inclined, or if you ride a lot at night, there are several high performance 35 Watt H3 replacement bulbs that will work great on the California Vintage or any other H3 lamp.
If you want to keep, or surpass, the Guzzi factory brightness while using fewer Watts, theH3 PIAA Xtreme White Plus 35 Watt (p/n 70323) bulbs will do the trick since they give off of an equivalent of 70 Watts (for about $42 each from PIAA, or about $39 from Motorcycle Superstore). A slightly less expensive PIAA 35 Watt bulb is their Star White (p/n 70363) , which gives of an equivalent of 60 Watts for about $27 each from PIAA.
 I have to keep my motorcycle expenses to a minimum so I decided to swap mine over to H3 standard halogen 35 Watt replacement bulbs for about $6 each from Motorcycle Superstore. (They also sell the PIAA Xtreme bulbs for about $39 each). Total cost for my two standard H3 bulbs with shipping and a new copy of MotoUSA magazine was less than $19. I considered this a good deal, especially because the automotive parts stores wanted $13 per bulb for the standard H3 halogens.
 To replace both the auxiliary light bulbs, the only tool needed is a phillips screwdriver. It took me about 15 or 20 minutes to do both. I took the opportunity to have my 9 year old son help me so he could learn. He also took all these pictures for me while I changed the bulbs. It was a win-win deal.
Located on the bottom front of the chrome bezel is a single stainless steel screw. Loosen the screw slowly to avoid stripping the screw head with the driver. After removing the screw, pull the bottom edge of the lamp bezel outward while pivoting at the top of the lamp housing. Lift the top of the bezel up over the raised lip and now it is only connected by 2 wires.  Hold the lamp assembly to avoid excess strain on the two wires coming from the rubber boot.
Carefully peel the rubber boot away from the rear of the lamp assembly to expose the wire connector. For whatever reason, my California Vintage has a red/orange boot on one light and a black one on the other. Anyway, slide the rubber boot back down the wires toward the lamp housing shell so that you can get to the covered connector on the white wire. The connector is a locking type, but all you need to do is pinch it with your fingers to get it to release the blade on the white wire.
 Next, you will see there is a small metal wire clip that is sprung into place to hold the metal flange on the H3 bulb into the receptacle. Using your fingers, just spread the two ends of the wire gently to release it, but try not to permanently deform this wire. Once opened, it can be hinged backward out of the way.
Lift the old H3 bulb out from the receptacle holding it by the white wire. Be careful not to touch the bulb if it is still good. Touching the bulb will shorten the life of it due to the natural oils on your skin. Obviously, don’t touch the new bulbs either, just hold it by the white wire or maybe the metal flange.
 Install the new H3 bulb in the same way, with round flange cutout to round side and flat cutout to flat side. Next, swing the little wire spring clip wire back over the bulb flange and cross the two ends of the wire spring clip over to lock them into their holding places.
Next, plug the blade on the white wire into the connector on the blue wire and make sure the little detent finds the hole on the blade so it locks. Slide the insulating cover back over this connector. Slide the rubber boot back towards the new bulb, being careful that the black wire and blue wire pass back through the hole of the boot. Work the rubber boot into it’s original place on the rear of the lamp reflector.
 Place the lamp assembly back into the rear lamp shell by hooking the top of the bezel on first and swing the bottom closed. Check that the screw hole lines up properly and that the ribs in the lamp lens are straight up and down – correct as needed. Turn on the lamp top make sure it is working, then turn it off, insert the screw and tighten it down. Repeat these steps for the other lamp and you’re done.
I consider the auxiliary lights to be a safety feature, and I flip them on in the daytime when I’m on a busy road that has a lot of cars turning in and out of places. I also run them when I’m at busy 4-way traffic intersections. By changing them over from 55 Watts to 35 Watts, I can now use them without worrying so much about the battery. Of course, I’ll still not leave them on while idling for very long.
I’m not sure why the Moto Guzzi factory does not install 35 Watt bulbs in the California Vintage auxiliary lights instead of 55 Watts, other than for Wattage bragging rights, but this is something the factory should be doing.
 If you own a Moto Guzzi California, but not one that came with factory driving lights, Hepco & Becker offers a nice looking kit for about $260 USD. Part number is 400.521 for the California, Jackal, Special and Stone. Harper Moto Guzzi is one of the places that sells these.
Interestingly, the early publicity photos of the California Vintage seem to show this same round chrome tubing bracket like Hepco offers. I would not be surprised if it was from them as they supplied factory Guzzi accessories for several years. For some reason, Guzzi changed to the two aluminum brackets rather than keeping the much more attractive (my opinion) chrome tubing. Since the Hepco & Becker lights come with 55W bulbs, you’ll need to do the same swap to 35W as I did.
If anyone has tried converting the stock lamps to LEDs or has tried other solutions, please leave a comment to share what you did. Personally, I’d like to swap over my clear fog lenses to amber color lenses, but so far I have not found any that are a direct fit. Does anyone know if there are amber lenses that are completely interchangeable with the clear factory auxiliary light lenses?
Categorized Under
About John Clay
Suggested Articles
-
Installing 35W bulbs in fogs on Cal Vintage
Installing 35W fog light bulbs is a simple way to reduce battery drain on a Moto Guzzi California Vintage. I explain and show photos how I replaced the factory 55 Watt H3 bulbs with 35 Watt H3 bulbs on my 2007 California Vintage. I have no idea why I waited so long to do this.
-
Moto Guzzi California Black Eagle 2010
The often debated retro style tail light from the California Vintage now also comes on the Guzzi Black Eagle Edition California. I do get a variety of comments about the tail light on my Vintage.
-

California Vintage photos in video
For my 4th grader’s first computer-related paid job, I asked him to make a slide show video using some pictures of our Moto Guzzi California Vintage so that we could post it on this site and on youtube for fun. He did a great job. We hope you enjoy!

Moto Guzzi California Vintage Fog Beam Reflector Replacement:
https://www.youtube.com/watch?v=UvqHnOvyn-k
I have a 2009 CAL VIN that I bought as a wreck and restored after it was involved in a serious accident. I’ve learned a lot while rebuilding it and riding it for the last year.
The problems people are having with the California Vintage charging system are easy to correct. The system as designed has plenty of capacity to run all the lights and even heated grips in you would like to install them.
The problem stems from the electrical connector connecting the two yellow wires from the alternator to the regulator Take the regulator off the frame and work the wires out of the frame until you get to the connecters. There is plenty of wire tucked up in the frame and you should be able you pull it out far enough to get good access to the connectors. The GREEN//RED//WHITE connector is probably O.K. but should be taken apart and filled with dielectric grease to keep corrosion out.
The two YELLOW wire connector is probably burnt, corroded and hard to get apart. When you get it apart you will see why you battery gets low. This connection is not heavy duty enough and gets hot and burns the wire ends out of the connector.
I cut the connector out and used high quality wire connecters and spliced the wires together, eliminating the connector. You may want to solder the connection if you don’t have very good butt splices and a good heavy duty crimping pliers.
After spicing the yellow wires I wrapped the hole connection with electrical tape and just pushed them back up into the frame and reinstalled the regulator.
My battery voltage was about 12.3 volts at 3,500 RPM before I did this modification. It now runs 14.4 volts at 3,500 RPM. Plenty of power for all the lights and other accessories you might like to add.
Just bought a calli vintage secondhand and the previous owner had fitted LED bulbs in the fog lights so they must be available.
they are very bright but dont have a beam so its not going to light up the road just get you seen more. what they do have is a bluish tint so it looks a bit like a police bike from a distance whitch may not be legal but gets you noticed.
Dave, since I installed the 35 Watt bulbs many miles ago, my low battery issues went away. I also installed a Battery Tender Junior cable which I plug in occasionally. I don’t want to jinx myself, but I use my auxiliary lights almost all the time and I’m still running the original battery. I rarely ever reach 5000 rpm, and if I do, it is just for a second. So, my recommendation is this exact combination because it has proven to work really well for me. Also, my side stand kill switch works fine and so do my auxiliary lights. I recently had to re-adjust the side stand switch stop screw because it was not pushing in the switch quite far enough when I put the side stand up, so was killing the engine when I put it in gear. A very easy adjustment (about one half turn with a wrench) and all is fine again. Not use the lights and no safety switch = rubbish.
John
I experimented with the bike and sure enough… I found that if I switched on the auxiliary lights the battery went dead and I could not start the bike. I took it to the dealer for its 1000 mile service and explained the situation. I asked them to put 35 Watt bulbs in ( which they forgot to do) However, they did perform a voltage test on the bike. They told me that even if I installed 35 watt bulbs I should not run the auxiliary lights as the alternator is not powerful enough to power them and keep the battery charged. ( Even at 5,000 RPM) The dealer said that they called Moto Guzzi and the answer they were given was “not to use the lights” As the auxiliary lights are standard factory installed equipment ( and one of the reasons I initially bought the bike) it seems the factory should have a better answer
I have an additional problem that is not a big deal, but still a safety issue. The side stand cut-off switch does not work, the dealer told me that the bike is wired that way and there is nothing that can be done, additionally the dealer told me that the bike will start while in gear…..
Anyway….I installed 35 Watt bulbs and bought a Jump Start Box which fits nicely in the side bags. I now switch the lights on ” Very Occasionally” in heavy traffic and use the Jump Box to start the bike….So far so good
Dave, sorry to hear that. I’m guessing fuel line and/or drained battery due to running the 55 Watt auxiliary lights. Please let us know what you find out.
John
I have been stranded twice since getting my brand new California 3 weeks ago, It was towed back to the dealer once now I am stuck again. Obviously there is some major communication problem between the manufacturer and dealer..
I will change the bulbs and see if I can ride more than two days on this bike without it breaking down
I experienced that problem with the california vintage. the bike runs out of battery very fast and doesn’t really recharge will driving! TELL YOUR DEALER TO CHANGE THE BULBS RIGHT WHEN YOU BUY THE BIKE unless you wanna get stranded like me…
Having looked at the lights on the original bike pics I though that there was a nice chromed bracket holding them on, it appears by your shots and the parts catalog (which can be found here: http://www.motosportaprilia.com/MGParts.asp?mod=GU07900&tbl=30&tblname=30%20Lights%20II) that its just a piece of angled metal.
I wanted to get some spots for my Aqulia Nera, however at £80 for a bit of bent steel, and EEK amounts for the lights themselves Im not sure Ill bother.
Amusingly the Aquila Nera has the switch for the fogs, but just doesnt fit them, it was obviously too much money to provide a different switch gear!
Gavin.